Showing posts with label Pooh and Friends. Show all posts

Friday, April 19, 2013

Cut it Up Challenge # 17 - Trees

Happy Friday my friends. Thanks for hopping by my blog for another Cut it up Blop Challenge.

Cut it up Challenge #17 - Create a project using a tree for Arbor's Day.

This was a fun project for me since I knew that I wanted to use the Camping Critter cart for this challenge. Here's my Arbor Day card.

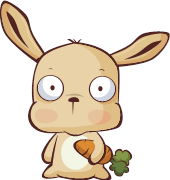
I just love the cute little rabbits hiding behind the trees. What do you think?


Supplies:

Cricut Cartridge
~ Camping Critters
Tree with bunny on pg. 57 cut at 4" and 4 3/4" - The 4" tree was cut using the Flip feature.
~Pooh and Friends
Clumps of grass on pg. 29 cut at 1" and 1 1/2"

Cuttlebug Folders
D'Vine Swirls - trees
Swiss dots - background grass

Punch - EK Sucess
Large scallop punch - used on background grass

Extras
Foam Tape - front tree and front clump of grass
Zig pen in black for doodles on bunnies
Zig pen white for dots on bunny noses

Stamp ~ My Pink Stamper
Have a tree-mendous day

Inks ~Stampin Up!
Basic Black

Card Stock
used all my scraps, solid cs is from Recollections.


Hop on by the Cut It Up Blog to see more inspiring projects today from the Cut it Up DT and to play along.


Thanks for stopping by.


Tuesday, March 5, 2013

Christmas Card # 12

Happy Tuesday!!! I am happy to say that I made another Christmas card.

I'm looking forward to Thursday afternoon when I will be driving to SC for a long weekend.

I've been craving Disney lately thanks to my SIL so I dug out the Pooh and friends cart for this one.

I kept this simple by sticking with two colors and I love how this turned out.


I'm entering this into the following challenges:
Every day is an occassion - Linky Party
Craftin Desert Diva's - Craft it up Linky Party - Anything goes
Paper Playtime - Anything goes
Challenges 4 everbody - Anything goes
Christmas Card Challenges - Anything goes
Winter Wonderland - Bears


What I used:
Pooh and Friends cart: pg. 49 Pooh cut at 4"
pg. 23 snowman cut at 3"
Snowman's scarf - Swiss dots Cuttlebug folder
Card base Snowflakes cuttlebug folder
Card size A4 - 5.5 x 4.25
Recollections Paper from scrap stash
Brad from stash
Zig white pen to highlight Swiss dots on snowman scarft
Studio g - gray chalk ink to highlight Pooh and snowman
Foam tape to pop up Pooh, snowman and tag
Tag made by me
Studio g - Christmas Stamp set in dollar bin from Michael's


“It is more fun to talk with someone who doesn't use long,
difficult words but rather short, easy words like "What about lunch?”
A.A. Milne, Winnie-the-Pooh


Thanks for Stopping by


Friday, January 18, 2013

Friday, Jan 18th - Winne the Pooh Day

Happy Festive Friday!!! Hope you had a good week and are getting back in the swing of things.


Having a Winnie the Pooh Day is a wonderful way to bring in a Friday here at My Cricut Craft Room. So here is what I came up with for today's project.

I wanted something special to give to a friend who has been there and back again on her own Hobbit's adventure. I am so happy to have her back. We go together like two peas in pod. Okay enough with the gal pal talk and on to my project.

I made a holder for some tea to give to her to show her my appreciation. I started with the Artiste cart and cut the pocket card on page 47 at 5". I used my strong red line tape to hold the pocket tight so I could stuff it with some tea bags.


I thought Winne the Pooh was a perfect fit for this pocket card since he loves his honey and what goes better with honey than tea? I know what you're thinking my southern friends, are you crazy Tami, you need a biscuit with that honey. Well honey, I can't put a biscuit in that pocket card so I stuck with the tea. ;)

I cut Pooh at 3" and tucked him behind the pocket to make it look like he was peeking at my friend. I still needed a little something to jazz up the front of my card but it had to be Winnie the Pooh-ish. So I dug out my Inkadinkadoo stamp set and found the scalloped punch stamp; I stamped that on a piece of white CS using SU Basic Blk ink and then I hand cut around the scallop. I decided that I needed to use the same yellow CS that I used for Pooh as the center circle to help bring my design together so I punched a 1 1/4" circle with my EK Success punch and adhered it to the center.


The sentiment, "You're tea-riffic" and the tea bag came from Fiskars stamp set.
I used the Jaded Blossom's sentiment "Stir, Sip & Enjoy" as the background using Crumb Cake SU ink. The twine is from Boxer Scrapbook ~ Disney twine asst. colors. I used my Zig pen in blk for the doodles around the pocket card and on Pooh.

That's it!!! Hope you enjoyed my project today.


For a complete list of Cricut Carts visit: http://mycricutcraftroom.blogspot.com

Saturday, July 28, 2012

PBD Challenge #4

PBD Challenge #4

Create a project using a silloutte.


What I used:
Paper from my scrap stash. Yay for me!
PBD Stamp Set: Animated Greetings 2
Ribbon from my stash
Winnie cut at 4 1/2" from Pooh & Friends cart

Thursday, January 26, 2012

Football Season

I am finally back in my craft room!

Lately I've been working on my Face Book Fan page for Scrappin Rabbit Designs and trying to set it up so that my blog posts populate the fan page. This has not been an easy task. But enough about that for now.

Since the first holiday around the corner is Groundhog Day, I had to make a card for the occassion.
And of course I went straight to my Disney carts to find Gopher.

I had a certain friend in mind for this card and since he's a big Packer's fan. I had to figure out a way to incorporate football with gopher. After some thought I decided the perfect thing to use was the helmet.

What do you think? I had fun creating this card and I can't wait to send it to my friend. I hope he likes as much as I do..


Here's how I did it:

I used the Pooh & Friends cart and cut gopher out at 4" using Recollections cardstock.
I printed the helmet, attached it to a scrap piece of cardstock and then cut around it.
The sentiments were also printed on my computer: I say it's still Football Season, front cover and Happy Groundhog Day! inside card.
I used SU Basic Black ink to ink the edges of my two tags. Then added some dots with my zig pen for a little extra detail.

For the inside sentiment: Happy Groundhog Day! I used the Taylored Expression Frame it Up! - 1 die. I absolutely love this die. If you have never used Taylored Expression dies I encourage you to give it a try. She has a clear transparency included with the die so that you can use it to center around your sentiment then mark it so that when you use the die you will get it right the first time. Eyeballing does not work for me. :)

Other supplies used:
Zig Black pen for detailing
Zig glue
Foam tape
Brads
Grass background cardstock from Hobby Lobby

Thanks for stopping by.

Monday, September 26, 2011

DISNEY PIXAR LINK-UP PROJECT: Card

If you are looking for my Disney Pixar Blog Hop Post Click HERE

Most people know that I just love to make cards over everything else. Well here's my Goofy Halloween card for the Disney Link up today. I saw Goofy and could not resist using him in my card.


Details:
Stampin UP! Patterned card stock cut to 6x6; solid cs in really rust and dusty durango
Creating Keepsakes card stock from the All in One 8x8 Scrapbooking Kit
Rest of card stock from my scraps

Mickey and Friends Cartridge:
Goofy cut at 4½”
Lolly Pop cut at 2”

Pooh and Friends Cartridge:
Witch hat cut at 1½”

EK Success small butterfly punch and 1¼” small punch
Spellbinders Labels Three die-cut
Studio g stamps
Bakers Twine from my craft spot
Gelly Roll Stardust pen
Cuttlebug D’Vine Swirls
Lavender Hampton Arts ink used to enhance the swirls
All card stock from my scraps

I hope you will join us in the Disney Link up party. To participate click on the links below:

Shawn http://craftychicsblog.blogspot.com/ Link your scrapbook pages
Melissa http://www.disneydreamerdesigns.blogspot.com/ Link your cards
Amy http://www.lovetocrop.com/ Link any other Disney projects (cakes, decor, anything that is not a card or scrapbook layout)

Monday, September 12, 2011

Broom Parking

Happy Tuesday everyone. I am playing along with Kristal at Getting Kricky today. Her challenge is any Halloween project.

I love how this card turned out. I think it's my best one so far. What do you think?


Here's what I used:
Mini Monsters cart:
Cut broom at 3 3/4"
Cut street sign at 5 1/2"

Pooh & Friends cart:
Cut hat at 1 1/2"

SU Top Note die
My Craft Spot Happy Haunting Stamp set
MS Silver glitter pen used to outline everything
Spider Brad from Eyelet Outlet
All paper from my scraps
Jump rings from HL
Foam tape

Thanks for stopping by and hope I you enjoy your day.

Monday, September 5, 2011

No Peeking

I am way behind on my Christmas cards so now that I have all of my projects finished up for the upcoming Disney Pixar Blog hop; I have time to work on some Christmas cards again. Since I'm in the Disney mood I had to create a Disney Christmas card. As I sorted through the pictures on my Pooh and Friends cart I stopped at the picture of Pooh Bear with his hands behind his back and saw my card come to life while looking at Pooh.

Here it is hope are enjoying your day today.


Here's how I did it:
Pooh and Friends Cart
Pooh cut at 3 3/4"
Rabbit cut at 3 3/4"
Carrots cut at 1" - I cut the shadow and both of the icon images

My card is cut at 5.5 X 8.5" then scored in the center

My stamps came from Studio g - Dec 25th and No peeking. The scarf came from my sledding bunny stamp from Lawn Fawn. I borrowed his scarf to put on Rabbit. As one bunny to another I knew he wouldn't mind.
Cuttlebug D'vine Swirls as the winter background behind my two characters.
EK Success Large scallop and small snowflake punches
Bling from AC Moore's dollar bin
Stardust Stickles used for the snow
Making Memories tag maker rim to outline my oval tag
Zig black pen for the details on Pooh, Rabbit and tags.

Sunday, June 12, 2011

Sweet Dreams LO

Happy Sunday everyone. I made this layout for my bunny Boo since he loves to be covered up or lay on blankets. He is such a cuddle bun.


I'm entering this project in to the following challenges:

Lasting memories LO Challenge #42 - create your own background using a punch.

BittenByTheBug2 Challenge - Use the clouds from the Pooh & Friends cart.

Frosted Designs Fabulous Friday Challenge - Use stitching on your project; faux or real.

Recipe:
Pooh & Friends Cart - Cut clouds at 1 1/2"; cut moon at 2"; cut stars at 1", 1 1/2" and 2".

Cut clouds out of light blue cardstock from The paper company.
Cut piece of white pearlescent cardstock from Colorbok to place behind clouds. Cut stars using pearlescent gold cardstock from Colorbok.
Moon cut from paper from my stash.

Dark blue cardstock from Wausau paper to use as matte for pictures and punched trim. Dark brown paper from my stash. I think I got this from AC Moore in their single cardstock area.

Punches used from EK Success
Zig pen and gelly roll white pen used for stitches and details.
SU Not Quite Navy Ink used to highlight blue clouds.
Martha Stewart baker's twine used to tie stars to LO punched trim and moon.

Hope you like it. Enjoy your Sunday.

Thursday, April 21, 2011

Getting Cricky Camping Challenge

I came across the Simply Sunday Challenge over at Getting Cricky. We have to make any campy type project of our choosing. I love to camp and have not been camping in several years so I knew I had to join in on the fun.

For some inspiration I decided to go to the hundred acre wood to see what Piglet and Pooh were doing. Well as you can see they are sitting outside by the fire.


One of my favorite things to do is to sit outside by the fire with family and friends. I am so pleased with how my layout turned out. I Hope you like it too.

Details:
I cut Pooh and Piglet at 3”, the tree house at 4 1/2" and the grass at 4" and 5" from the Pooh and Friends cart. The fire at 3" from the going places cart.

I added stickles to the flame and used foam tape to pop all my images.

All the paper, the brads and hardware are from my stash. I used marvy markers to add detail to the logs in the fire, the tree, the grass and the stitching around the picture frames and page.

Outside mats were cut at 4 1/2" X 6 1/2". The inside mats were cut at 4" X 6".

The weather has been sunny and warm here in NC and I am trying to enjoy every moment of it when I'm not at work or cleaning the house to get it ready for our company this weekend. I sure hope that we will be sitting outside by our fire this weekend.

Have a wonderful Thursday evening.

Sunday, April 10, 2011

Come and get it challenge

I came across this new challenge blog this morning and wanted to share the news. This challenge is the friendship challenge. Click here to play along.

Here is my entry for the challenge. I haven't created a friendship card for quite some time. Shame on me, so this challenge gave me the opportunity to make a special card for a special friend. I decided to use the Pooh and Friends cartridge for this card. Hope you like it.


Recipe:
I cut Pooh at 5", the honey pot at 2 1/2", the grass at 1" and 1 1/2" and the bee at 1" using my scrap paper.
SU oval punch
Martha Stewart large border punch
Inkadinkado black chalk ink
Crystal Stickles
Technique Tuesday clear stamp set - got this from Creating Keepsakes Convention.
Hampton Art Ink for highlights
Color Box Fluid Chalk in Ice Blue

Thanks for stopping by...

Wednesday, April 6, 2011

Eeyore Card

I made this card for my son Brad and his wife. Brad loved his Eeyore when he was little so I wanted to include Eeyore in his Easter card. I am entering this in the Sugar Sweet Paper Treats April Challenge and the Tuesday Throwdown Challenge


I’m proud to say that all the paper that was used in this card was from my scrap bin! So here’s how I did it.
Pooh and Friends cart - cut the log at 2” then cut Eeyore at 2 ½”.
Mickey and Friends cart - cut the grass out twice at 2 ½” in light and dark green cardstock.
Sugar and Spice Lite cart - cut the Bunny at 2”
I used Marvy markers to highlight the lighter grass in front after I ran it through my big shot with the Swiss dots cuddlebug folder.
The sentiment stamp is from MTF One sweet Chick clear stamp set.
The eggs stamp is from Studio g.
The ribbon was from the dollar bin at AC Moore.
The brad and eyes are from my stash.
Black Ink from SU
Martha Stewart Glitter markers used to color the eggs.
Hampton Art Ink used on tag around edges.
Color Box Fluid Chalk Ink in Pink Pastel used to color in tag.
Foam Tape used on Eeyore and pop dots used on top layer of grass.

Thursday, March 10, 2011

Rain, rain go away!

It’s been raining here for the past two days so I was inspired to create a card using my new April Showers cart. I cut the happy cloud at 3” and the surprised cloud at 1 ½”. The umbrella was cut at 2” and Pooh Bear was cut at 4”. Pooh came with a honey pot so I cut that off and replaced it with the cloud to make it look like he was trying to see if there is anymore rain inside the little cloud.

The background paper is from DCWV Summer Dream stack. The umbrella's patterned paper is from My Minds Eye Penny Lane stack. The solid paper that I used for the clouds came from American Traditional Designs textured cardstock and it cuts like a dream on the cricut. The paper that I used on Pooh Bear was from the paper studio textured card stock stack. The sentiment, faces on the clouds and rain drops are from the 2008 Holly Brooke Jones for My Cute Stamps set. The ink is Not Quite Navy from Stampin Up!

I had a lot of fun making this card and am not sure if I can give it up so I may have to frame it!